|
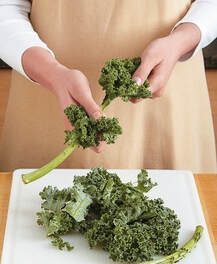
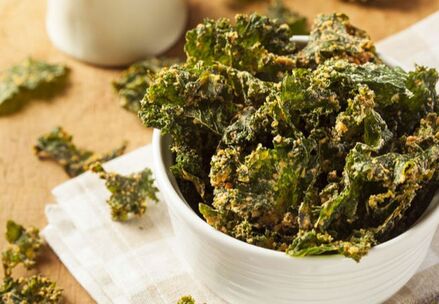
Addictively healthy these dehydrated kale chips are easier to make than you might think. High in fiber, vitamin A, K, C, and loaded with amino acids they make a perfect healthy version of a crispy "cheesy" snack.
 Instructions:
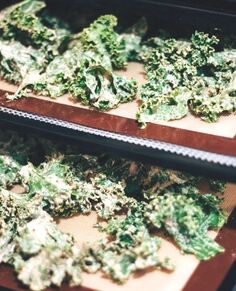
Variations of this recipe are endless. Use other nuts or seeds such as walnuts, almonds, pecans, sunseeds, pumpkin seeds. Go lemony, add Mediterranean herbs, herbs de Provence, heavy garlic, teriyaki or asian flavors. This recipe can also be dehydrated in a very low oven, 200 -225 degrees. However you must keep a watchful eye on it using the oven, as they can easily over crisp. Especially be careful to turn the trays if you oven bakes unevenly. ENJOY!
1 Comment
This basic recipe can also be adapted by using pumpkin seeds, pine nuts, or sunflower seeds as a substitute for the cashews. Cooking is a creative process, once you have the basics down, try adding your own flair to it.
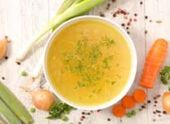
 The Seven Vegetables Longevity Soup
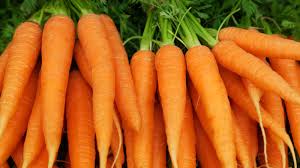
This recipe comes to us from Master Teacher Gilles Marin of the Chi Nei Tsang Institute in Berkeley California. the BTH recent Blog post, April 2020, Fear Not - COVID-19 contains vital and wise information that Gilles shared with trainees during a retreat training that took place in the middle of the COVID scare. He recommend this soup recipe as a way to build immunity and to feed the body when someone gets ill. Read the Fear Not COVID-19 Blog Ingredients:
Directions:
Reheating: Dilute either with water, broth of choice, or bone broth. Adjust salt to taste. Serve hot with fresh chopped parsley on top or add some thyme while reheating to improve digestion. Add variations on serving for individual tastes:
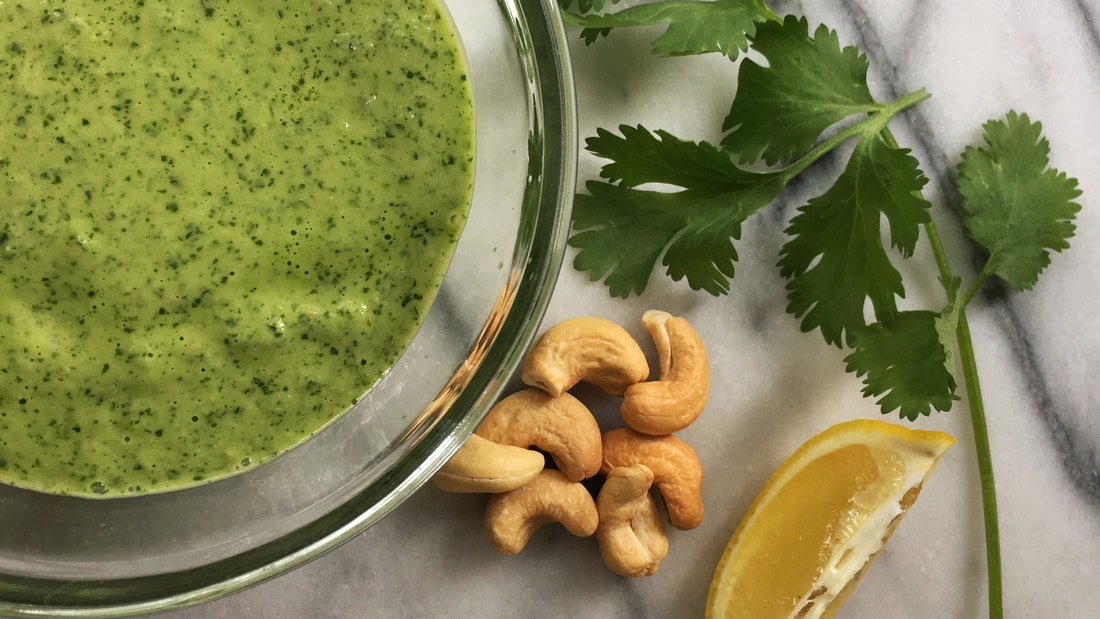
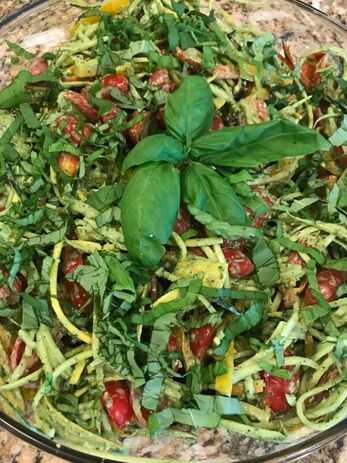 Zucchini Noodles with Pumpkin Seed Pesto
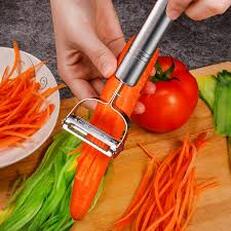
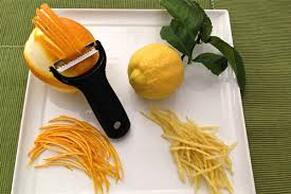
Mix all ingredients in a large bowl, place on serving dish, top with chiffonade of sweet Italian basil. Serve at room temp for the most flavor. Pesto Use soaked pumpkin seeds or pumpkin seed butter, with fresh basil, cloves of garlic, salt, 21 Salute, olive oil. Put all in the blender or food processor and mix, adding oil as needed to create the right consistency. A thick paste but, not too thick. The "pesto" can be made with any nut or seed you have on hand. Walnuts, pine nuts, cashews and sunflower seeds are all good choices. Julienne Peeler is the tool you use to make veggie noodles. This handy little tool brings a lot of creativity to the kitchen! Here's a great Utube Video demonstration by Melissa Joulwan, author of Well Fed Weeknights, Well Fed: Paleo Recipes For People Who Love To Eat, shows you how to make zucchini noodles with a julienne peeler.Get more recipes and videos at Melissa's website The Clothes Make The Girl
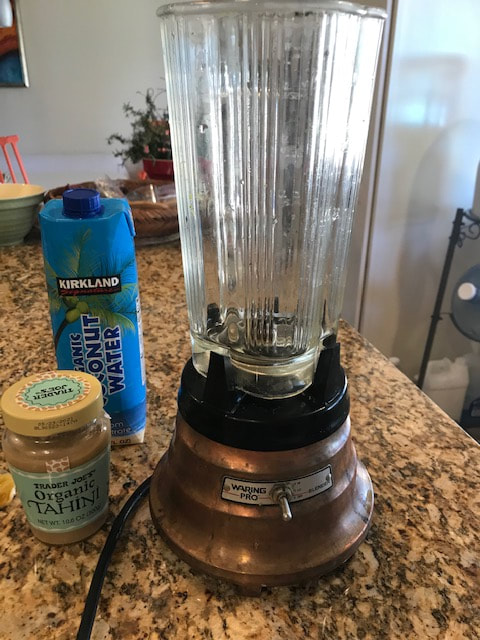
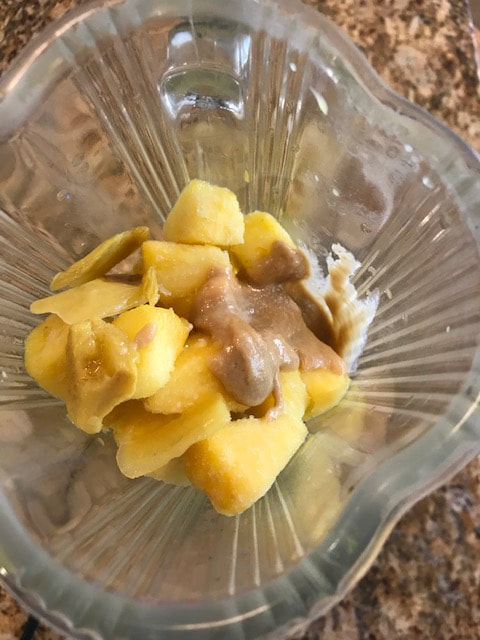
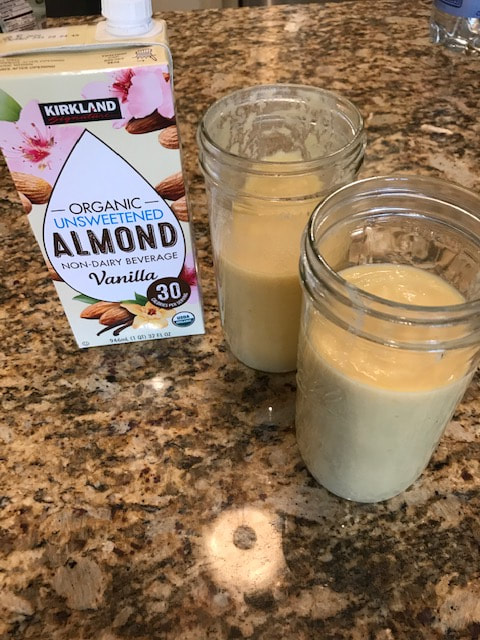
Smoothies can be made from and endless combination of ingredients. I've been making smoothies for so long, I don't even think about it! Whatever is on hand can end up in my morning smoothie. Please share your favorite combo's here!  Pineapple Upside Down Smoothie: Taste like Pineapple upside down cake! This smoothie combines two of my favorite flavors pineapple and tahini! Place cut up fresh or frozen pineapple in your blender, see the pics. Add almond milk, coconut water and 2 tablespoons of sesame tahini. for extra spice add 2-3 tablespoons ginger juice or fresh ginger sliced thin, or ginger powdered Option to add a 1/8 teaspoon powdered vanilla or vanilla extract. Optional to add gingerbread spice if you have it. Make it extra creamy skip the coconut water and use all almond milk and extra tahini and enjoy! 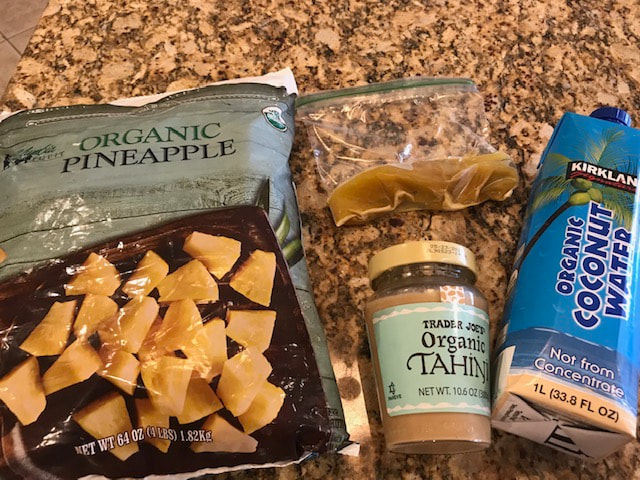 Important to use organic pineapple! In the baggie frozen ginger juice. Tahini and coconut water.
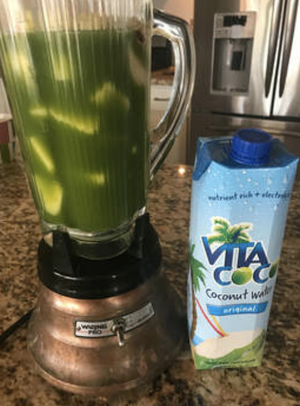 Here's a smoothie and juice recipe... This starts with a fresh juice blend, one of my favorites from the recipe blog. Kale 4 oz Apple 8 oz Ginger 1 tbls Lemon 2 tbls When making the juice, use a 24 ounce Ball Freezer jar and top off with spring or RO water approximately 1.5 ounces. For the smoothie: 12 ounces of the juice blend 2 cups of frozen organic pineapple 1 small banana or 1/2 a larger one Top off with coconut water enough to blend it smoothly. This makes two servings approximately 1.5 cups each. Add whole flax seeds if constipation is an issue for you!
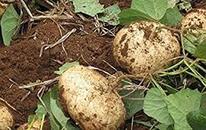
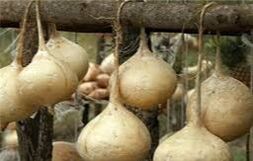
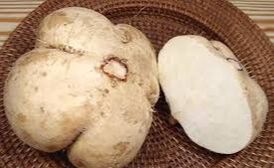
Jicama is a root's whose exterior is yellow and papery, while its inside is creamy white with a crisp texture that resembles raw potato or pear. The flavor is sweet and starchy, reminiscent of some apples or raw green beans, and it is usually eaten raw, sometimes with salt, lemon, or lime juice, and chili powder. It is also cooked in soups and stir-fried dishes. Jícama is often paired with chili powder, cilantro, ginger, lemon, lime, orange, red onion, salsa, sesame oil, grilled fish, and soy sauce. It can be cut into thin wedges and dipped in salsa. In Mexico, it is popular in salads, fresh fruit combinations, fruit bars, soups, and other cooked dishes. High in vitamin C and low in carbs, Jicama is a great option for a low glycemic diet. When fresh it is juicy and tender with a crisp snap. Look for them in most produce departments, but make sure the skin is thin and slightly papery. As they remain in storage or are picked over mature they become tough and fibrous. Part of the plant or poisonous, so if you want to grow your own, make sure small children are not able to reach the leaves and stem. Do not cook or use any other part of the plant, except the root. 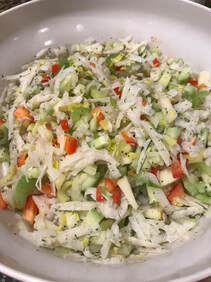 Jicama Slaw - A great refreshing summer salad dish
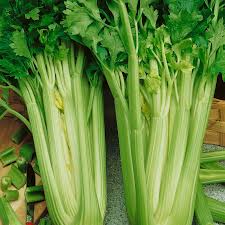
1 small or 1/2 a large fresh jicama root, skinned and grated 5-6 stalks of celery, including the leafy tops, thin slices 1 large or 2 medium red, orange or yellow bell peppers, diced 1 large or 2 small gala or other semi-sweet apple, thin slices and diced 1 large or 2 small cucumbers, peeled and diced 1/3 - 1/2 cup plain goats milk kefir 1 tablespoon raw honey 1/4 cup apple cider vinegar 1 - tablespoons dried celery tops* or fresh mint chiffonade Salt (whole salt with color) and fresh ground black pepper to taste Place all the ingredients in a large bowl and toss with the liquid ingredients, add the salt and pepper to your taste and serve. Can be served on a bed of romaine or with tacos as it is a great companion of a spicy hot oily dish! This summer salad provides a lot of structured water with it's very juicy vegetables, aids constipation and resolution of "heat" conditions of the digestive tract. * When I get a particularly leafy bunch of celery I like to take the bulk of the deeper green leafy tops and dehydrate them for use as a dried herb. These darker green tops can be tough and a bit bitter, but as a dried herb they bring the quality of parsley (celery's cousin) to the party without the somewhat metallic taste parsley can have. Here in Arizona, all you need to do to dehydrate your celery tops is to place them in a colander, set them out on a warm day and within a day or so they will be nicely crisp and dry. Flake them in a large bowel and transfer to a small jar or shaker. Small dehydrators are relatively inexpensive and are a great tool for preserving foods and making all kinds of tasty recipes. Jicama is a very versatile ingredient! Enjoy these other Jicama recipes...
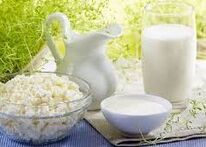
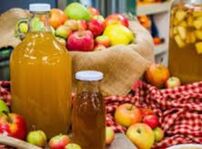
Having recently posted the Kim Chi - Fermented Veggies Recipe as an abundant source of probiotics. I've decided to include some additional fermented foods recipes from around the world. Naturally fermented foods are high in beneficial flora, commonly called probiotics. Having a balanced gut microbiome is a crucial part of strong immunity. The most important factor with probiotics is that they must survive the stomach acids. Capsule supplementation may be needed for some individuals, but to get enteric coated (An enteric coating is a polymer barrier applied on oral medication that prevents its dissolution or disintegration in the gastric environment.) probiotic is expensive. For most of us and those who are ill, a natural source of probiotics is preferable even when you are taking an oral supplement. Why? Because the probiotics that naturally form in fermented foods carry with them micro-nutrients and beneficial bacteria beyond what can be cultivated in a lab. They are a natural food to humans, in that we have been eating many forms of fermented foods and drinks for thousands of years. Our bodies "know" these foods. Kefir for example, like it's cousin yogurt, is rich in probiotics, which due to the fat molecules in milk, are able to make it past the stomach into the small intestine. Fermented vegetables offer a similar protection for it's probiotics, in that the vegetable cells have become infused with the beneficial flora. This encasing within the cells walls give it viability in the small intestine. Kefir is unique in it's ability to lay down a nesting network for beneficial flora to reproduce in, an incubator, if you will. I like to stay with goat's or sheep's milk, as these are lighter in fat and have smaller protein molecules than cow's milk, making them easier to digest. For my fermented dairy I prefer grass fed, no hormones. Other fermented foods are Yogurt, Kombucha, Miso, Apple Cider Vinegar. See the recipe links below. noun: kombucha; plural noun: kombuchas a beverage produced by fermenting sweet tea with a culture of yeast and bacteria."bottled kombucha is available in many natural food stores" Fermetaholics brings us these step by step instructions for making your own home brew of Kombucha - How to Brew Kombucha . Additionally they also sell supplies and starter scoby. It's important to have a well balanced scoby for a starter. Kombucha is a "wild ferment' meaning it can pick up bacteria from the environment it ferments in. A good healthy scoby is like sour dough starter is to bread making. The Kitchn defines the scoby as ...... an acronym: Symbiotic Culture Of Bacteria and Yeast. ...the scoby is the living home for the bacteria and yeast that transform sweet tea into tangy, fizzy kombucha. It a rubbery raft that floats on the surface of the kombuchas. Go their website by following the link for another great kombucha recipe.  kefir | kəˈfir | A Russian word for a sour-tasting drink make from milk fermented with certain bacteria. Kefir has a more liquid texture than yogurt and contains different strains of bacteria. I found this great recipe on "The Pioneer Woman" website. "Make Milk Kefir" Cultures for Health offer this great recipe using almond milk for those who prefer non-dairy options. You may also substitute other nut or seeds milks. How to Make Almond Milk Kefir  yogurt | ˈyōɡərt | (also yoghurt or yoghourt) A Turkish word for a semisolid sourish food prepared from milk fermented by added bacteria, often sweetened and flavored. Wellness Mama, a site I have loved sharing in the past has a great yogurt making recipe, which has a printable version. How to Make Yogurt (Easy Homemade Recipe)  Most of us have heard about raw apple cider vinegar's numerous health benefits, such as it stimulates the production of hydrochloric acid in the stomach aiding digestion. ACV helps alkalinize the body, reducing toxic over acid conditions of the blood which helps with conditions like gout. It's a natural anti-microbial reducing infections and promoting healthy gut flora. Also a great peel for your facial skin, or as an after bath rinse to recharge the acid ph balance of your skin. But, it also tastes great and can be added to many recipes. Tales of the Kitchen offers this recipe. "Homemade Raw Apple Cider Vinegar" 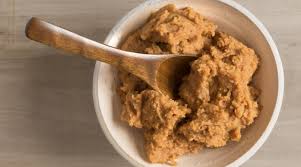 miso | ˈmēsō | 1 paste made from fermented soybeans and barley or rice malt, used in Japanese cooking. 2 (also miso soup) a soup seasoned with miso paste, often with added tofu or vegetables: a bowl of piping hot miso. Miso is a BIG subject from a small country, Japan. Learn more about Miso Made from a wide variety of beans or grains with an equally wide variety of flavors. I found this delightful website "The Chopstick Chronicles", Whose miso recipe is simple and straight forward. Shihoko is a native of Japan, now living in Australia, whose passion for Japanese foods abounds in her website! It's time to get back to a more natural way of eating. Fermenting is a way of preserving foods that has been around for 1,000's of years. Fermented foods are found in every culture. We have only scratched the surface in this blog. Other fermented foods include sour doughs, tea varieties, vinegars made from other fruit juices, unpasteurized beers and low alcohol ciders are just some of the examples to be found. Please post your successes with pictures in the comments portion of the blog.
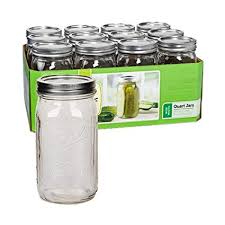
For an overview of the importance of fermented foods and gut health see this article from the folks at the Good Gut, "Can Probiotics Survive Stomach Acid and the GI Tract?" 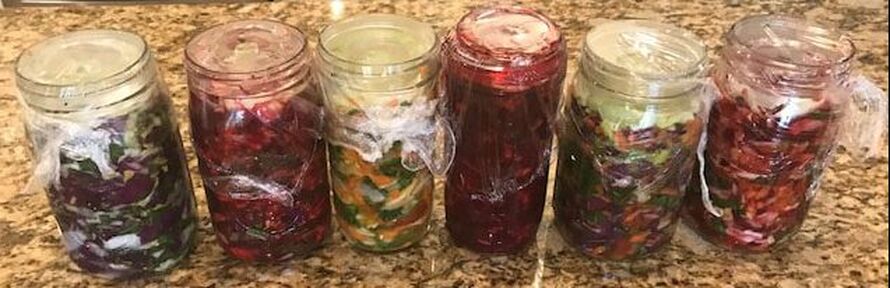 Kim Chi is a Korean version of sauerkraut includes ginger, chilis, garlic, as well as added greens like dandelion to create a hearty and satisfying addition to any meal. Fermented vegetables have been part of many cultures for thousands of years. They are undoubtably one of the richest sources of probiotics whose benefits far out weighs anything you can buy in a capsule! The only food for the beneficial flora in the colon is the fiber from fruits and vegetables. Without a diet rich in these foods colon health suffers. Fermented vegetables are the quickest and surest way to restore health to the digestive system. 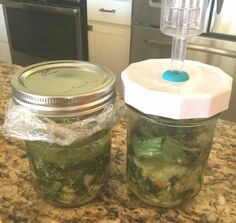 Making Fermented Vegetables in small batches is made easy with the help of glass weights made by Solgit, available online, I purchased mine through Amazon. I found an article reviewing the best lids for fermentation as I have always made my Kim Chi and Sauerkraut in my large ceramic crock. I tired two versions in a test run, the glass weights by Solgit and Sauer System Lids. The Sauer System lids did not apply any weight to the veggies therefore the liquid did not cover the veggie mixture leading to contamination...mold and fungus! Systems like the plastic lid require the addition of water to the veggies...just way to fussy for me. The glass weights are perfect. I made several test batches with them and they were all successful! They are the hands down winner in my book.
Making fermented vegetables is a step by step process. Doing the small jars makes it not very time consuming. My first trial small batch only took me 5 minutes to chop the veggies and place them in the jar! Another few minutes to season after two days and that's it!
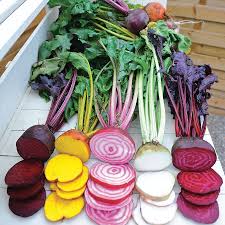
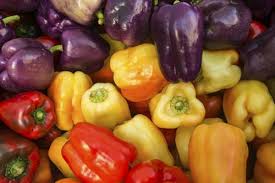
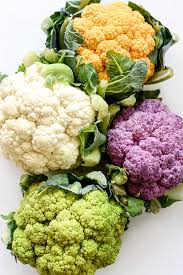
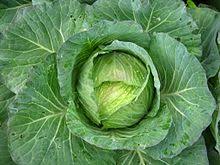
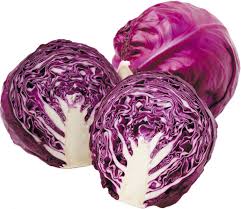
Flavor combos are limitless! But, some folks like the fermented flavor just as it is with nothing added. Here are so me of my favorites... KimChi Add to the mix chili powder, chili flakes for a little more heat, powdered or fresh garlic, minced ginger. Traditional kimchi has anchovies added, I skip that addition. Amount of spices and herbs used will depend on the size of the jar. For the 24 -32 oz jars approximately... 1 teas chili powder A few shakes of chili flakes A dash of cayenne if you really like it spicy 1/2 teas garlic powder or 1 clove minced fresh garlic Cilantro, dandelion greens are an excellent addition to the Kim Chi flavor profile. Carrots added with the initial ferment add a sweetness to this spicy ferment. Other options... Beets and Purple Cabbage Add onions after initial ferment, go easy on this choice, they can easily over power the flavor. Dill or pickling spices work well with this combo Black pepper is good also. Beets, Carrots and Bell Peppers (red and yellow make for a nice color combo) Season with black pepper, finely minced tangerine or orange peel is great in this combo Bok Choy and White Onion With this blend go easy on the onions, fermenting really brings out the pungency of onions When ready to season I really like just the addition of dill and celery seeds to this blend. It's a bit like dill pickles! Purple or Green Cabbage - A More Traditional Sauerkraut Version Ferment only the cabbage, no additional veggies. Season with caraway seeds and coriander for the traditional Euro style sauerkraut flavor. Beets with Celery This is a great combo! The bitter saltiness of celery balances the rich sweetness of beets. Fresh Anise is also a good addition to this combo at the initial fermenting stage. Flavor with any seasonings that appeal to you such as... Anis leafy portions Celery seeds Dill leafy portions or seeds Coriander Seeds Black Pepper You will soon find your favorites! It's my belief that proper response to the foods we eat should be an overwhelming YUM! Tasty fermented veggies will add the YUM to almost any dish you add them to. Eat them as aside dish with eggs, baked potatoes or add to a salad. Great on tacos and sandwiches or eat with crackers or rice cakes. Regular consumption of fermented veggies will improve digestion and elimination a secret long known by the cultures whose use of fermented veggies goes back in history literally thousands of years!
The Ball Mason Jars are available on-line through Amazon and are also sold at
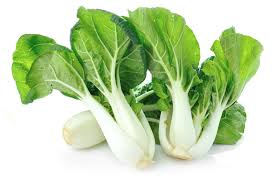
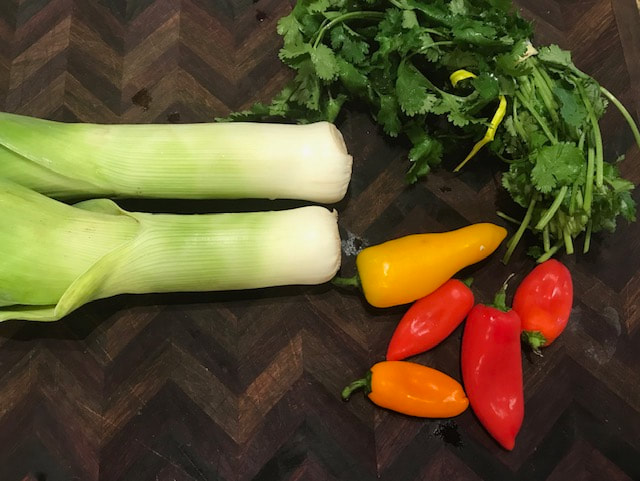
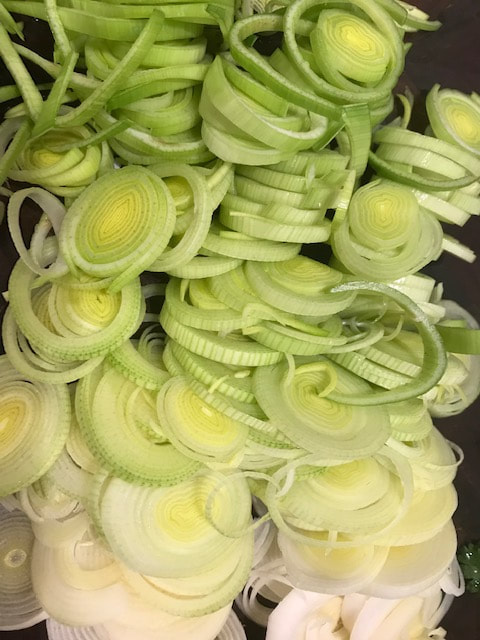
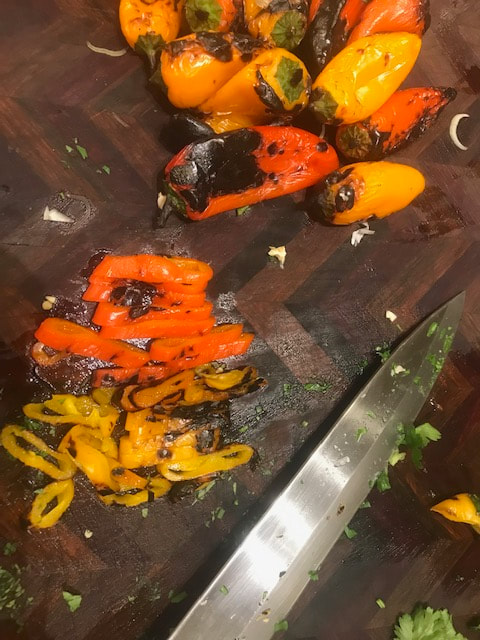
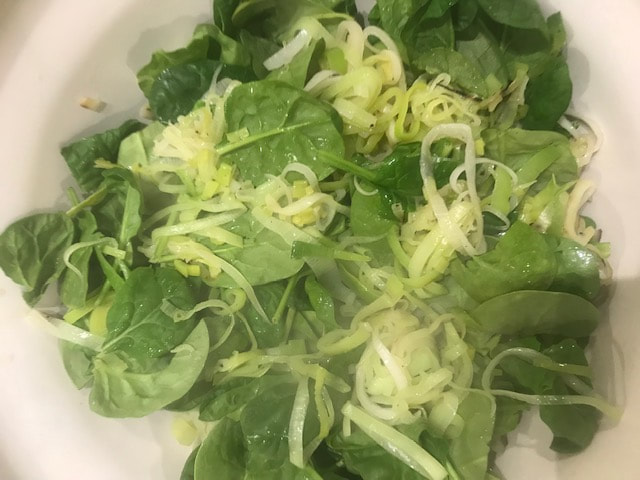
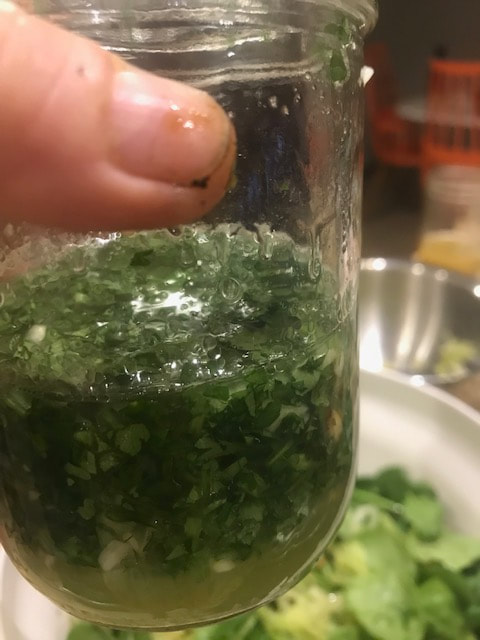
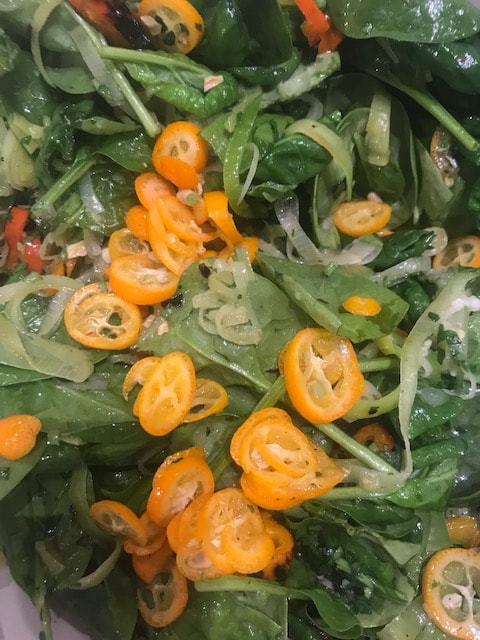
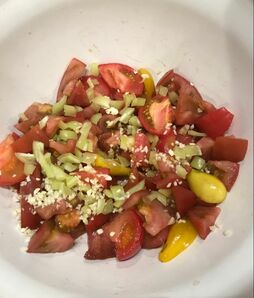
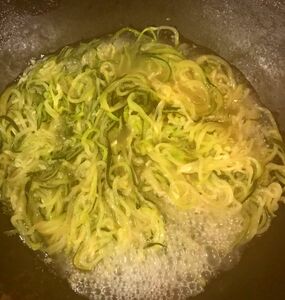
Ace Hardware Stores, Walmart and most regular grocery stores. A classic, you'll find many uses for these jars! As a part of the Bridge to Health of our Bridge to Health Spring Cleaning Seasonal Detox we are focusing on spring green vegetable. This week I created this semi-warm salad with leeks and spinach. This salad only took 20 minutes to prep including time to take pics and post to Instagram! Ingredients: 2 whole leeks, thinly sliced. Be careful to make sure you have cleaned the sand out that catches between the leaves. 1 cup bone broth, chicken or beef, or vegetable broth, your choice 10 - 12 mini-bell peppers, roasted and sliced 4 cups of spinach in a large salad bowl 6 - 8 kumquats, a wonderful sweet and sour fruit that brings a brightness to any dish you use them in. Prep: Roast the peppers first. We use an old BBQ warming rack, but there are roasting racks you can buy on-line Slice the leeks and place in a wok or large frying pan with the broth. Steam stir fry with no oil until softened Remove the peppers from the grill, and soon the leeks from the fire. Place the leeks in a bowl to cool and Slice the peppers into rings. Thinly slice the kumquats Toss peppers, leeks, kumquats and spinach in the bowl with the dressing below and serve with the dressing below, or any dressing of your choice. Dressing: Juice of one large or two small grapefruits a sweeter variety if you have it. If not add a bit of raw honey to taste. 1 bunch of cilantro finely chopped and then mulled in pestle to release it's full flavor. 3/4 cup of oil of your choice, avocado, walnut or olive oil are all good choices 1/4 cup of rice vinegar Salt to taste Place all ingredients in a mason or ball jar with the lid tightly in place, shake until emulsified, then pour over the salad. For the Detox we are eating only fresh fruits and vegetables, but this salad is excellent served with steamed rice, quinoa, rice cakes or any whole grain cracker of your choice. Adding some walnuts as a topper will bring more texture. Any nut or seed you like would be good! Bridge to Health sponsors several Seasonal Detoxes and Fasts throughout the year. We are currently near the end of the Winter Seasonal Detox. Friday evenings of this two week detox end with a raw meal and fasting from Saturday to Sunday evening. I came home tired and starving after a busy day in which my only meal was three bites of a banana, a few sips of sesame milk and 4 ounces of veggie juice! I didn't want to stray to far out of the recommendations of a raw meal previous to the fast, but felt like I needed some warm comfort food. The recipe below is what I came up with! We had just harvested some beautiful heirloom tomatoes, yes in Feb, when you live in Scottsdale! I put those tomatoes to use with this warm salad and the results left us speechlessly munching it down with lots of nonverbal yummy sounds! Ingredients: Fresh made or frozen zucchini spirals for "noodles" = to about 4 cups when cooked 4 - 5 medium sized ripe tomatoes, or 2 cups of cherry tomatoes 5 cloves of minced garlic 1 wax pepper finely diced Whole salt 1/2 teaspoon 21 Salute from TJ's or any other herb blend of seasoning you prefer such Mrs. Dash or Spike 1/4 cup organic olive oil
|
VanessaPassing on my experience with natural foods and sharing recipes from others as well. Archives
June 2020
Categories
All
|


 RSS Feed
|
Bridge to Health Wellness
Awaken & Evolve Learning Center 7610 East McDonald Drive, Suites E & K Scottsdale, AZ 85250 805-235-8071 |
LinkTree - Find all our links here!
Booking Site - Social - YouTube Schedule Your Learn & Heal Consult Become a client Email: Bridge to Health Wellness |