|
Sprouting seeds and legumes is a great way to bring added nutrients to your diet. Sprouted seeds or legumes are enzymatically active protein sources that require little digestion. They also pack a lot of flavor. My two favorites are pictured below. Sunflower seeds and lentils, which come in many varieties and sized. Lentils have a peppery taste and can be easily made into a homemade hummus. Chickpeas aka, garbanzo beans are also excellent sprouted in the same way detailed below. I personally don't care much for alfalfa, radish, mung bean as I find them bitter. Although those with a Pitta constitution benefit from these bitter foods. Below you will find a list of "sprout'able" seeds, legumes and nuts. You can also sprout grains, but again, I am not a big grain eater so I don't. I have tried sprouting rice many times with no success, so I just don't bother with that! I have found what I like and so will you as you experiment with the options Over the years I have tried all kinds of sprouters and have found that low tech is the best way to go! 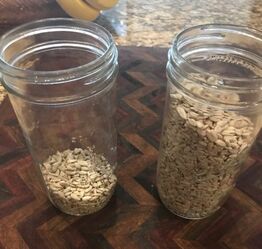 Here I'm preparing to sprout sunflower seeds. I keep my seeds in Mason jars in the frig or freezer, as here in Arizona it gets quite hot. Nuts and seeds can go rancid with exposure to heat and should be kept in cool dark storage. Don't sprout more than you will consume in approximately 3-4 days. Beyond that time they can get slimy, which means bacterial growth. No good! 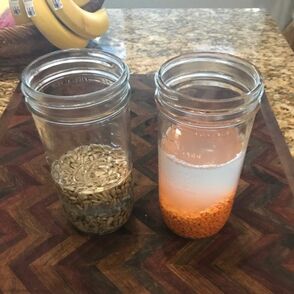 You will notice in the picture that I have added enough water to cover the sun seeds plus about 1" more. The lentils have more added water. This due to the fact that they will absorb more water than the sun seeds. You will soak the sun seeds for only a couple of hours Whereas the lentils require at least 4-6 hours of soaking for this small variety. Larger lentils and some of the smaller dense lentils need to soak over night. I've made those notes below with the list of sprout'ables. 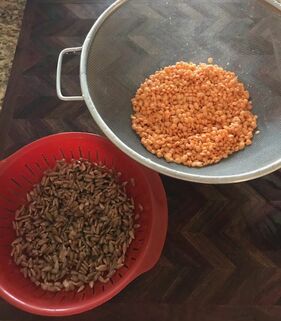 Once your seeds or legumes are soaked place them in a colander or sieve . I have several various sizes of colanders and sieves to accommodate my favorites to sprout. Make sure the the opening in the sieves are small enough that your seeds or legumes will not fall through them. Rinse them throughly after soaking. Once they are well rinsed place a plastic grocery bag or large zip lock over the colander or sieve.  You do not want to seal or twist tight the bags. The environment for sprouting needs to be able to "breath" allowing air to circulate and not stagnant which can allow for fungus or bacteria to grow on your sprouting seeds or legumes. You will then rinse the sprouting sprouts 2 -3 times daily. Sprout times vary with density of the seeds or legumes. In the case of these two sprouts, the sun seeds only need one day to start showing their shoots, the lentil take two days or so. Refer to the info below for approximate sprout times for each sprout'able listed. It's a good idea to finish off your sprouts with a quick hydrogen peroxide rinse to kill any unfriendly bacteria that may have found a home on them. Simply place them in a bowl and pour 3% hydrogen peroxide, enough to barely cover them, allow to sit for a few minutes and then rinse.  A great source for Sprout'able's! A great source for Sprout'able's! Almonds sprout nicely giving them a fragrant taste and delightful snappy crunch
Soak over night, sprout for 1 -2 days. Other nuts such as pecans, walnuts, Brazil nuts tend to get bitter when soaked and do not sprout. Pumpkin seeds fall into this category as well. They take on a bitter almost metallic taste when soaked or sprouted. Garbanzo beans make an awesome raw hummus and are delicious on salads Soak for 24 hours, changing the water at least two times. Sprout until the tails of the shoots start to show up. Soak in hydrogen peroxide before using. Mung bean and adzuki beans are very dense. Soak for up to 48 hours changing the water two times per day. Sprouting time will vary with the temperatures, but generally 3 - 4 days. Soak in hydrogen peroxide before using. Peas also make a great sprout. Follow the same directions as the garbanzos, however you can actually let the peas start to grow to their leafy stage. Just make sure to rinse often and watch for fungus. Alfalfa, clover, radish, broccoli all fall into the same category. Soak over night, change the water at lest once. Use a fine sieve. Rinse often, 2 - 3 times per day minimum. Allow to set on small leaflets and green up before consuming. Really watch out for fungus on these small seeds. Let me say it again....rinse often! Storing sprout in the refrigerator in a low open bowl with a damp paper towel over them is fine. If you do not use them within 24 hours be sure to rinse them before you do use them.
0 Comments
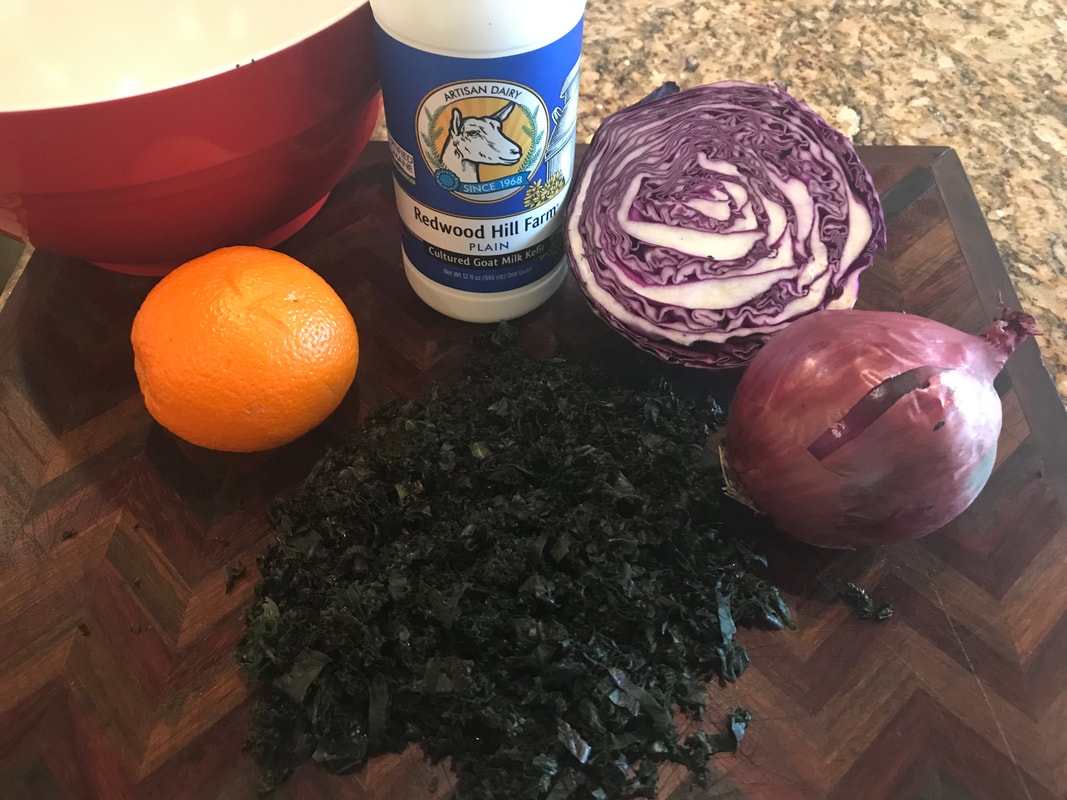
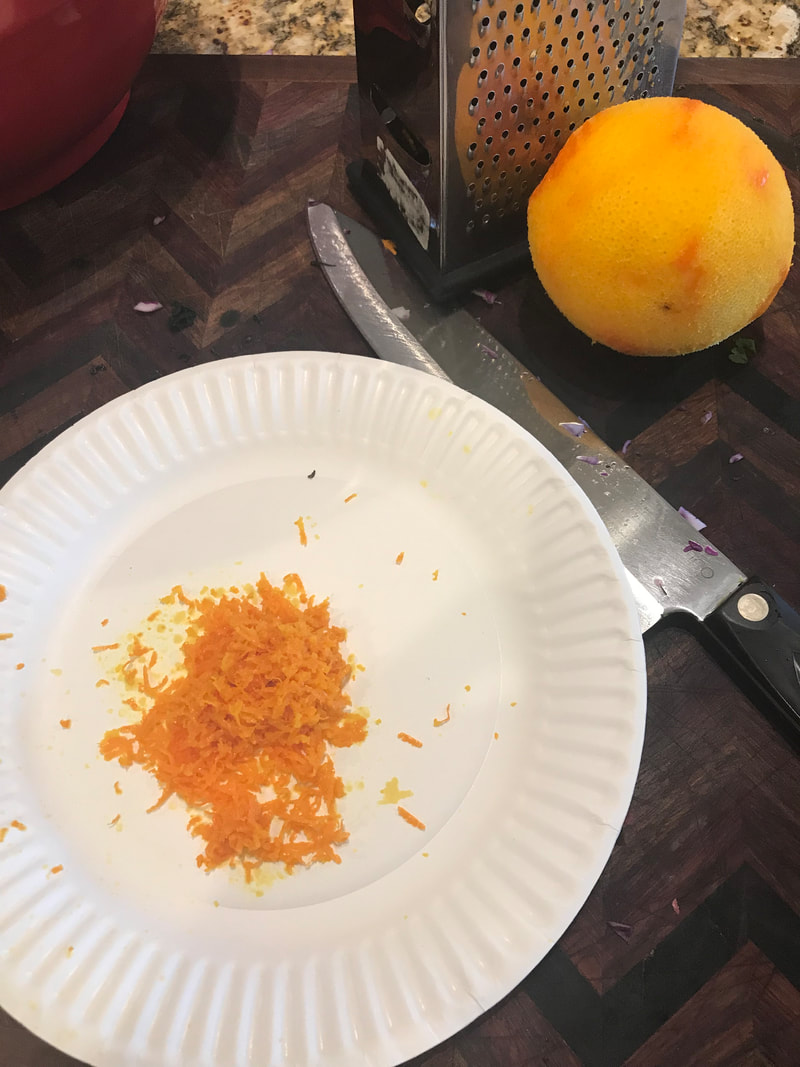
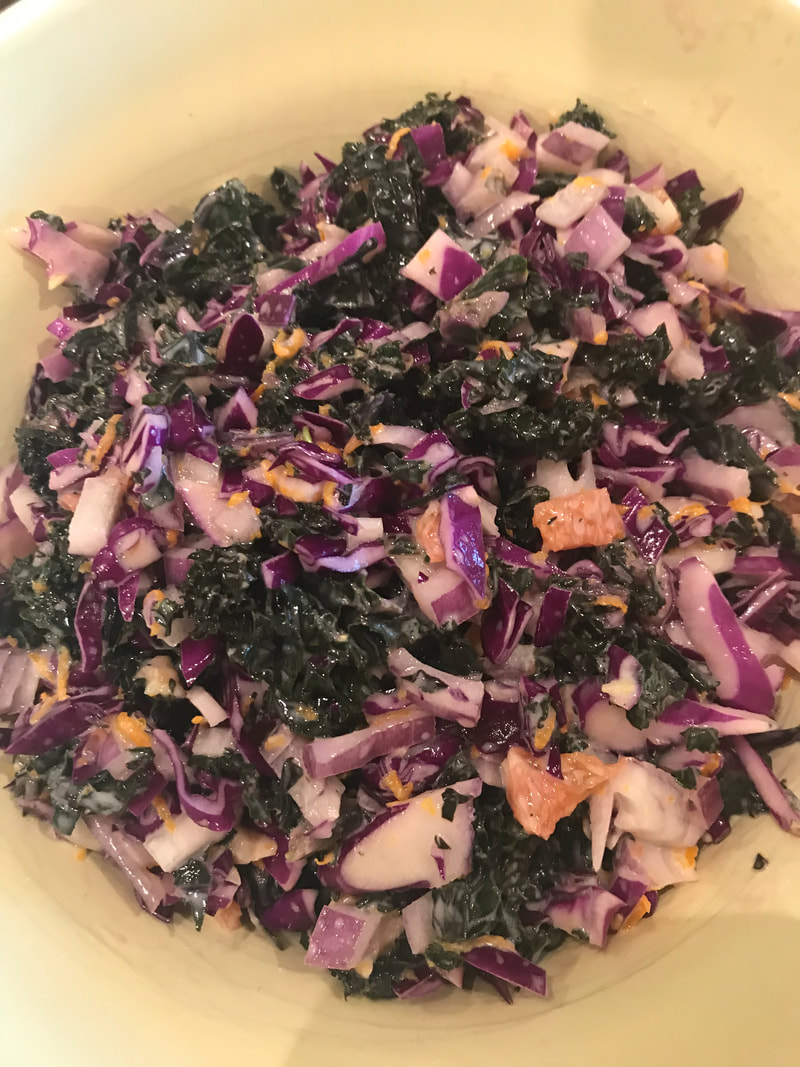
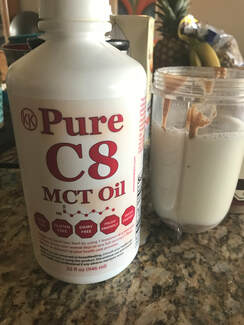
A picture's worth a thousand words. It's funny that I am posting recipes because I never use them! So I find pictures very helpful. PURPLE SALAD: 1/2 head of purple cabbage finely sliced and diced 1/4 of a red onion finely diced 1 bunch of purple kale lightly steamed. Be sure to de-vein the stems which are very fibrous and not very edible. Also make sure you squeeze the moisture out of the kale, otherwise your salad will be watery. I take the cooled, steamed kale, wrap it in a clean dish towel or paper towels, wringing the water out until it's fairly dry. 1 orange, organic or well washed. Grate the peel and save for the dressing Combine the kale, cabbage and onion in a large bowl Make the dressing.... 1/4 cup +/- of goats milk kefir, or an vegan non-dairy substitute Add the orange peel and the juice from 1/2 of the orange Add 2 - 3 tablespoons of Pure C8 MCT Oil or any other brand of MCT oil you prefer. Add a pinch of salt and a few grinds of black pepper Shake together and pour over the salad That's it. It took about 15 minutes to make this salad and a few more minutes to steam the kale. Healthy Eating Tip: Steam up a bunch of kale on the weekends, wring it out and keep it in the frig to add to any salad, soup or serve with rice through the week. It stores and keep well. Many folks like to eat kale raw, I don't. It's too tough for my taste and interestingly it yields more nutritional value lightly cooked! I do love it raw in juice, however! I served my salad with roasted butternut, beets and onions, delicious. Top off with pecans or walnuts, add cranberries or raisins for a little sweet! As an update to this recipe, look below to find a variation of this basic recipe for making Veggie Broth.
Use an 8 quart stock or soup pot Start with your chopped vegetables: 1/2 a head of green cabbage - chopped 1 large or two medium onions, yellow or white - medium dice 1/2 a bunch of celery, include the leafy tops - 1/4" slices or diced if you prefer 4 to 5 red potatoes depending on the size - diced 4 - 8 ounce cans of stewed tomatoes - organic is best, with all the veggies 10 cloves of garlic minced 1 - 2 Bay leaves depending on size 1/2 teaspoon celery seeds Beyond the basic veggies you can add.... Bell Peppers Zucchini Mushrooms Green Beans, fresh not canned Broccoli Kale, always a good choice Spicy Peppers, such as Wax Peppers, Poblanos, Pasilla which are milder, or go hot and spicy with.... Jalapenos, Thai Chilis, just make sure you don't get it too hot & spicy to enjoy! Place your selection of vegetable in your large pot Add the canned tomatoes Vegans will fill with water or vegetable stock. Bone broth from chicken or beef is a good stock to add. See the Recipe Blog for making your own Bone Broth Allow to simmer until the cabbage and onions begin to get translucent. At this time you are going to add whole salt to taste, some mixed spice seasoning, like 12 Salute or Mrs. Dash and/or any of the combos below to taste. Take your time, add a little of this and a little of that until the flavor makes you go yum! A bit or organic soy sauce, tamari or Worcestershire sauce will add a rich umami* flavor. Tomatoes are also rich in umami components and are high in lycopene which is more readily available when cooked. To deeply enhance the tomato flavor add 1 can of tomato paste or Organic V-8 type juice. Additional Spice Combos: Cumin, cilantro, and oregano Rosemary, thyme and parsley Curry Spice with lime
Veggie Broth - Alkalinizing and high in minerals. Good for adding to recipes whenever broth is called for. Frequently used when fasting to provide minerals and that yummy warm feeling for the tummy!
Follow the recipe above with a few additions...
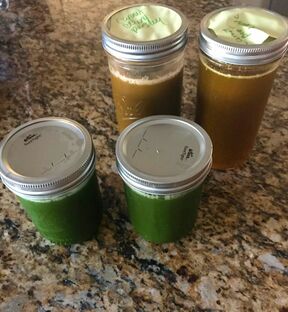
Here's where things will be different. You are going to simmer your veggie brew until all the veggies are breaking down to mere pulp. This over cooking releases minerals from the vegetables into the broth. This will take the better part of a day. You can start the night before, let your brew cool down with the lid off, cover with a dish towel and cook it down in the AM. Strain through a larger holed colander into a big pot or bowl. The strain again with a finer mesh sieve to remove the remaining medium particles. If you do not have a fine mesh sieve, you can strain through your colander a second time, lining it with cheese cloth. Cheese cloth can be purchased at most hardware stores, in the housewares or sometimes the paint department! Pour your broth into Mason freezer jars for storage. Freeze what you will not be using right away.
My favorite of all time.....
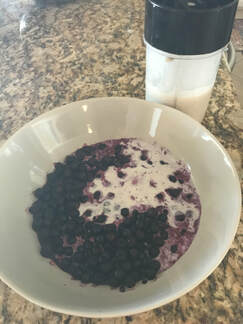
Kale, Apple, Lemon and Ginger In a 24 oz. jar you will add approximately 1/4 kale juice, which is very potent! Fill the rest of the jar up to about the 2/3rd's full mark with tart green apple juice. Add two or three tablespoons of lemon juice and ginger juice to taste. Top off with water about 1/3 cup. This is a rich juice, the water helps tone it down a bit. Kale is a potent detoxer, go easy when you first start drinking it. Beet, Apple, Ginger Follow the same proportions of the Kale juice above. Like kale, beets are also strong detoxifiers and can really work over the liver, go easy to start. Carrot, Celery, Parsley A classic! Fill your jar with mostly celery juice, up to a little over 1/2 the jar. Add carrot to the 3/4's mark and top off with parsley. Satisfying and balanced this is a great blend. For more juicing ideas and blends, find NW Walker's books, a man way ahead of his time! Check out these link for fresh ideas as well. Serious Eats Dr. Axe Juice Recipes for Your Health - As with NW Walkers books this site offers recipes for specific ailments!  There are many forms of fasting.
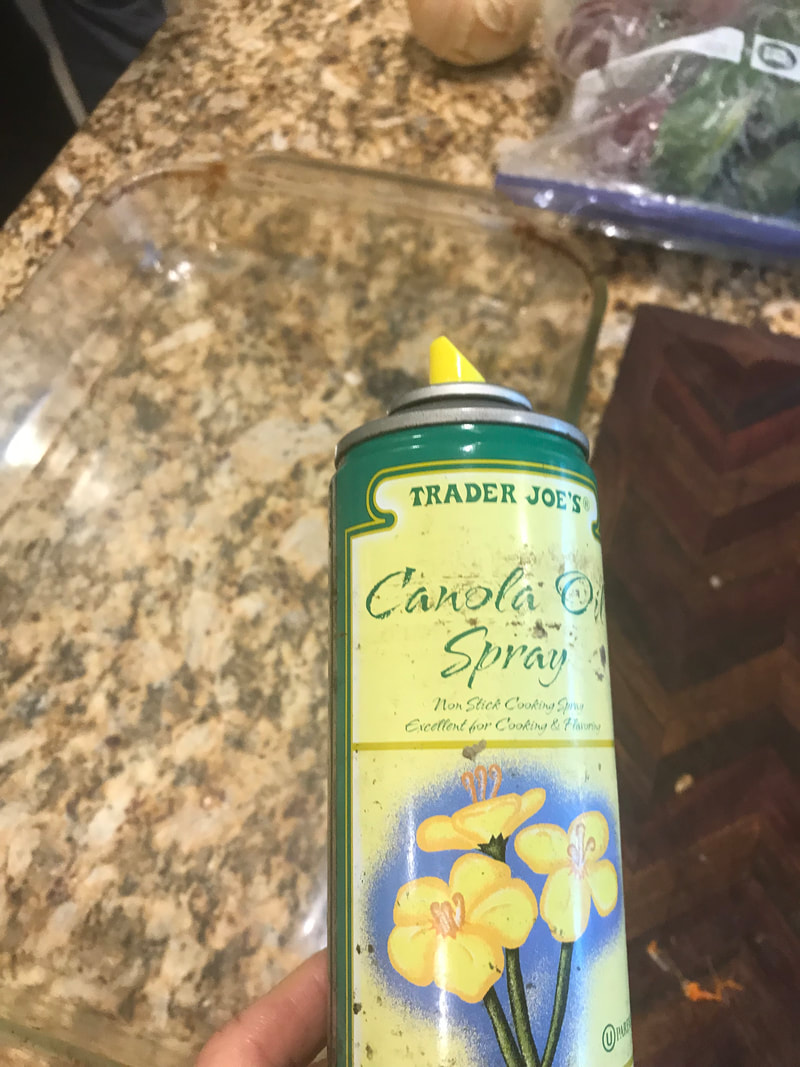
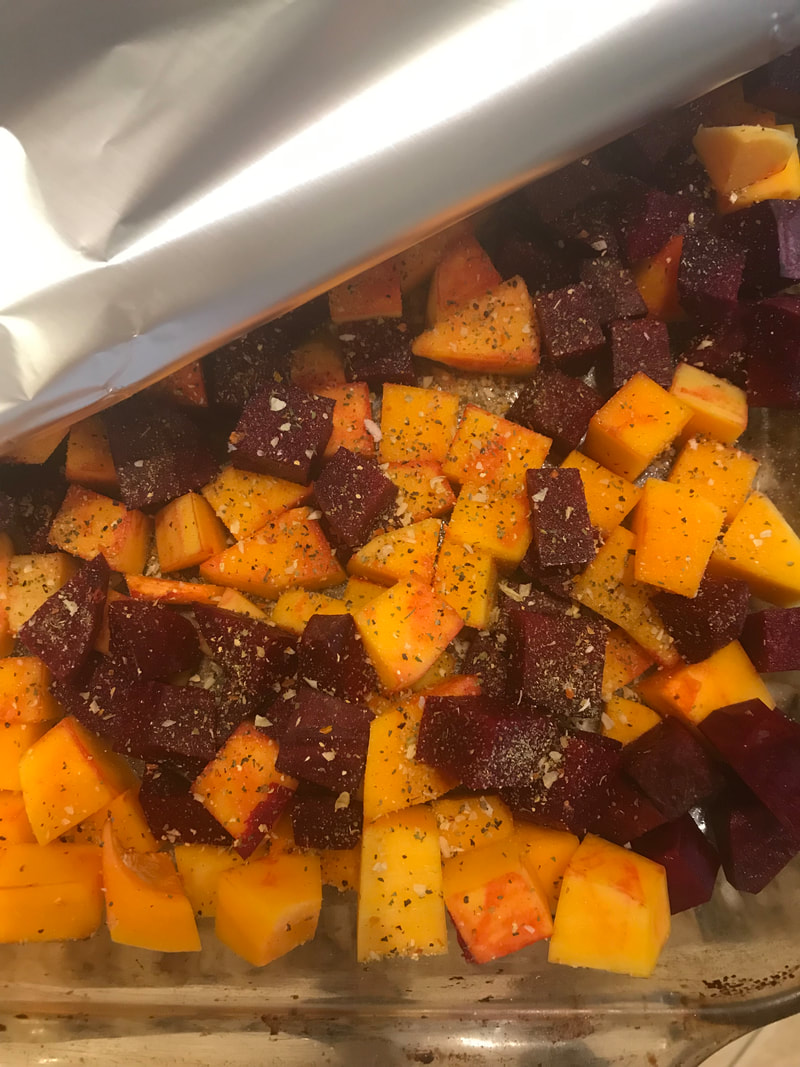
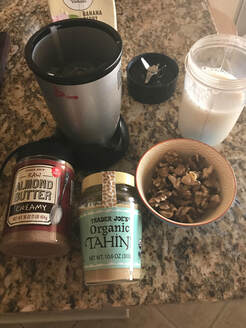
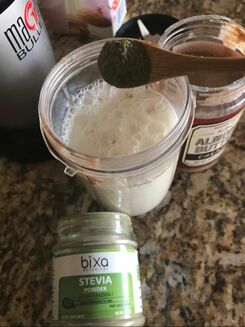
In some religious traditions a 24 hour fast ends with a small simple meal. This continues for 40 days. Strict water fasting is espoused by others and is decidedly therapeutic. This form a fasting is best worked up to over a time of intermittent fasts and detoxes. Water fasting can bring on intense detox symptoms, but something everyone should experience as it allows you to get in touch with your body on a deeper level. Juice fasting allows for the intake of alkaline nourishes fresh fruit and vegetable juices. This form a fasting infuses the body with nutrients and supports detoxification. There are other beverages that will support fasting and supply the body with elements to enhance the fast. Apple cider vinegar is the KING of fasting beverages. I actually recommend the use of ACV daily. I'll be posting the many benefits of ACV later. For now the important word is acetic acid, aids the breakdown of toxins and is antimicrobial. Make certain your ACV is raw, unpasteurized. It's the active enzymes of ACV that bring the benefits! My fav is Braggs, but there are many other raw ACV out there. Please look for organic. Recipe #1 ACV - 1/4 cup Fresh apple juice - 1/4 cup Sparkling mineral water - fill the rest of the container Sliced fresh ginger or ginger juice for flavor Recipe #2 4-5 teaspoons of ACV 1/4 - 1/2 Teaspoon of Cream of Tarter 1/2 teaspoon of whole salt. That's salt with color! Juice of 1 lime and cut some of the peel to float in it. Monk fruit sweetener or stevia, I prefer powdered over the liquid. Recipe #3 Juice of one lemon 2 -3 tablespoons of pure maple syrup - no corn syrup imitations 1/10, a pinch of cayenne pepper, or to taste Fill remainder of your 1 qt container with water, chill and drink through the day. Adjust all these recipes to taste. I like make larger batches so I don't have to set aside time to keep making new batches. Recipe #4 For 1 quart of this drink start with 2 ounces of wheatgrass Add the juice of two lemons a few slices of ginger or a shot of ginger juice really amps this drink up! Top off with sparkling mineral water Add a couple of drops of mint oil, great to clear the stomach and aid digestion. Dilute if needed. I drink a 20 ounce container of this beverage every AM. It help clear out the stomach of any residual gunk! Make by the quart or larger container, keep in the frig for keeping. Other fasting beverages that provide benefits..... Green tea iced or hot. Add a little honey if desired, but not too much Herb teas of all sorts. For the Detox we are using dandelion. Yogi Teas make a wonderful spicy dandelion tea. Coffee is okay, actually beneficial, in moderation. No sweeteners or creamers. Kombucha- moderately. A potent source of probiotics, but you . can over do this beverage. no more than 4 ounces per day. Best taken in small sips through the day. A pictorial essay on the basic idea of roasting vegetables. Because this particular recipe is for the Winter Detox there is no oil added. The reason for this is that in the Detox we are focusing on clearing the liver and gall badder, which suffer from the rich foods of the Holiday Season. Oil can be added after baking while still warm. This way your body get's all the benefit of the unheated oil with all it's vital nutrition! This recipe has.... 1 medium size butternut squash, peeled and cut into cubes 2 large or 3 medium beets, peeled, cut and cubed A handful of beet greens if there are enough tender younger ones in the bunch.* 1 whole white or yellow onion, thinly sliced Whole salt to taste 21 Salute (TJ's) or any other mixed spice seasoning you enjoy Preheat the oven to 350 Spray your baking dish with any non-stick spray you prefer. Place the beets and squash in the dish. The beet and squash take longer to cook, so cover them with foil and put them in the oven covered for about 20 minutes. Uncover and carefully remove the baking dish so you can add in the beet greens and onions. Mix them all together continue to cook uncovered for 45 minute to 1 hour, until the veggies are tender and caramelized. Top with olive, coconut or walnut oil and enjoy! * It's best not to use the larger, older beet greens. They are high in oxalic acid which can put undo strain on kidneys. A little oxalic acid goes a long ways! Nut and Seed Milks can be made by soaking and or sprouting the nuts or seeds of your choice. Almonds, cashews, pecans, walnuts, sesame, sunflower seeds, pumpkin seeds, pistachios. This method requires blending the nuts or seeds of choice with warm water, straining with a sieve or cheese cloth. Time consuming, but delicious!
|
VanessaPassing on my experience with natural foods and sharing recipes from others as well. Archives
June 2020
Categories
All
|


 RSS Feed
|
Bridge to Health Wellness
Awaken & Evolve Learning Center 7610 East McDonald Drive, Suites E & K Scottsdale, AZ 85250 805-235-8071 ~ Email |
|